Put up the pattern for my Doctor Who quote on my Patterns page :)
Scroll to the bottom
It's just a jpeg file, so just right click to save it and I don't have a colour chart for it because I just chose a colour that looked pretty :)
Saturday, December 22, 2012
Wednesday, December 12, 2012
Poor little neglected blog.
I've been so super busy lately, Christmas and things, and the fact that I got myself a full time job finally! HOORAY!
So that's my excuse: I got a job. And I'm still transitioning into it, so I'm still at the stage where I come home and fall onto the couch because my brains been overloaded with new information all day. But I am still making things, it's just going very slowly :)
Incase I don't post again beforehand, MERRY CHRISTMAS! :D
Tuesday, November 20, 2012
Friday, October 26, 2012
The Angels Have the Phonebox!
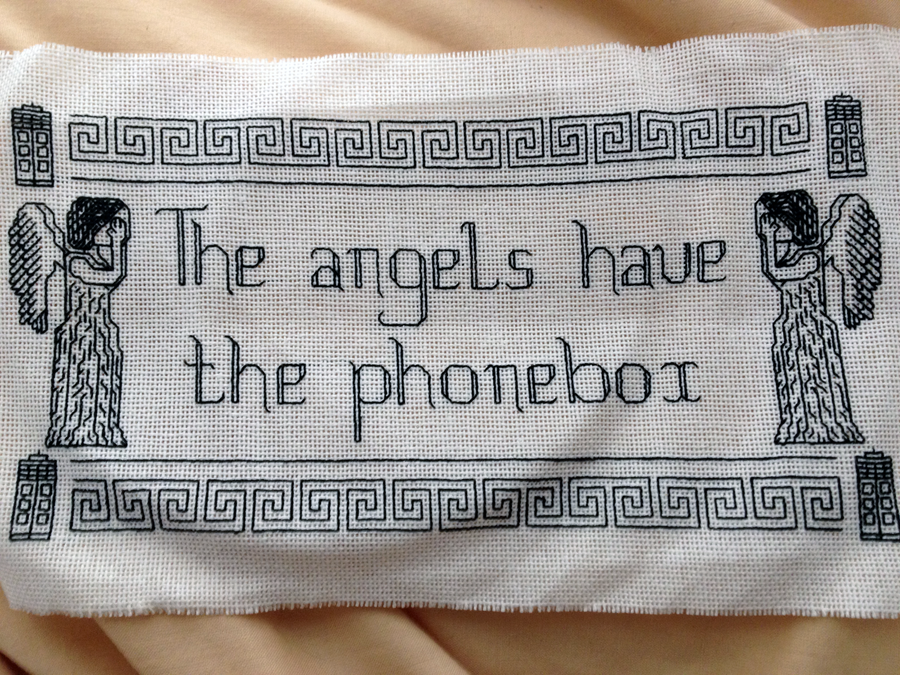
Quote from yet another fantastic episode of Doctor Who, Blink.
Next time I decide blackwork looks amazing and I need to have a go, remind me that lots of little lines are annoying, and that performing this act of blackwork embroidery on 28 count evenweave is a bad idea, please :)
But isn't it coool?

I love blackwork embroidery.
And how much does it look like some awesome foreignly written caligraphy from the back?
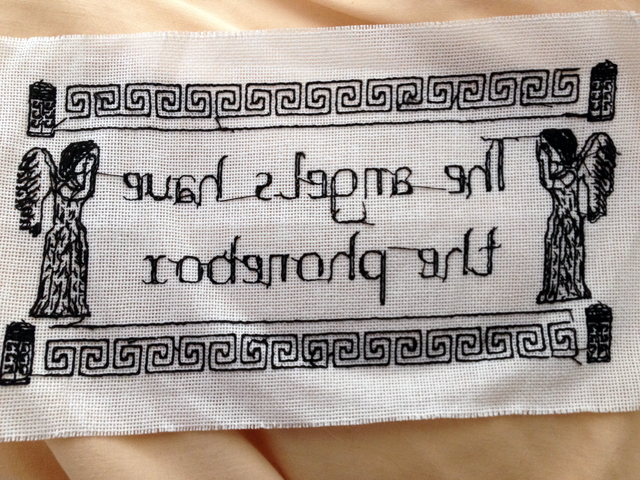
Still have to iron it and frame it, but Ive spent such a long time working on it, and I'm fairly proud of it, so it just couldn't wait :)
Thursday, October 4, 2012
Bear #4

I finished bear 4! I think he's pretty damn cute. Gorgeously soft and a beautiful colour.
I also tried out some acrylic clear eyes instead of plain black ones (not enough contrast with body colour). Hand painted (with nail polish - three coats of pale sparkly blue, one of silver-grey) to give him gorgeous baby blues.

Love his eyes.
Tuesday, October 2, 2012
Tinkerbell
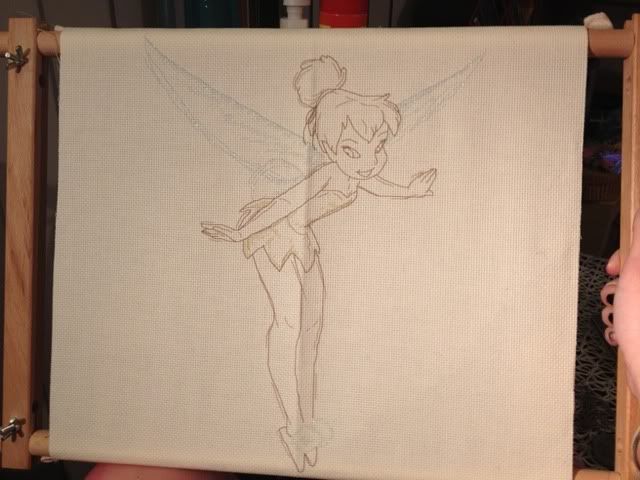
Bought this kit a long time ago. Decided it was time to stitch it!
I love this style. I think it is so entirely gorgeous. But, it's so not cross stitch. The whole thing was just back stitching and half stitches. And you had to stitch non-traditionally into the aida cloth. I almost couldn't, my OCD feelings really didn't like not stitching into the holes of the cloth... Having to make new holes in those perfectly aligned squares. Even to make this bit of pretty, I almost couldn't!
But she is finished, and oh so pretty. And sparkly!!
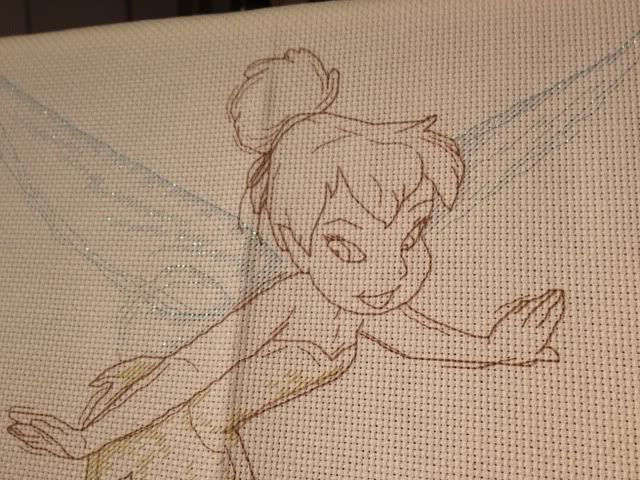
Her wings and the pompoms on her shoes are with awful-to-stitch-but-fantastic-looking metallic thread. Love this effect!!
Thursday, September 27, 2012
Post 60.
My 60th post! I'm excited. Even if you aren't.
Today I bring my framed Doctor Who cross stitch from my last entry, and another bear. And a half. One and a half bears.
So, the framed piece:
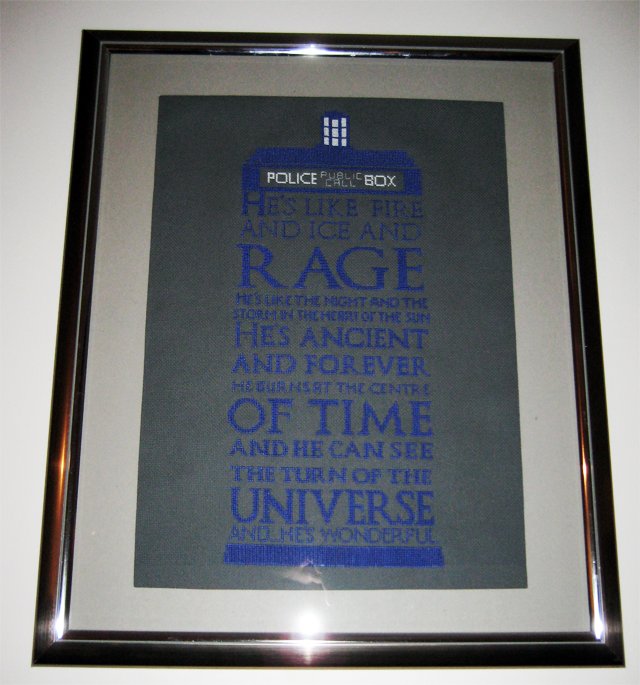
Was a size 40x50cm frame (as far as I can remember haha) to give you some idea of the scale.
Tried first with a black and then a white border, but it just looked funny. So, I used the inset that came with the frame, backwards, which was just a cardboardy brown and it works so well! I love the colours together! Nice and mute. Sadly, not fantastic in my house because I go for the bright and colourful, so this just gets lost on my walls.. so I was thinking that I might sell it, and make myself another, on black....
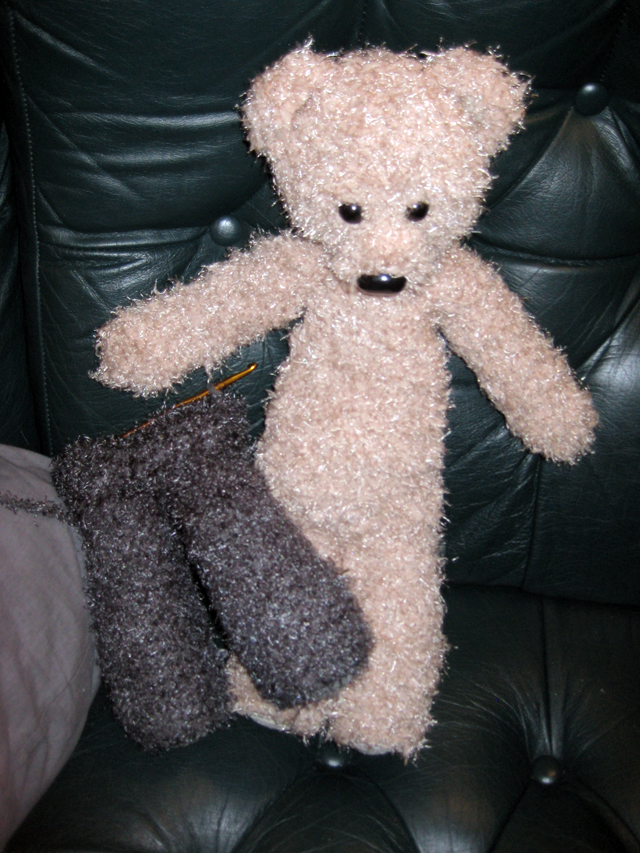
Someone at the baby shower loved my first bear so much, they asked if they could buy one! So I made her this pale one, and then found this brilliant grey wool... so started bear 4. And bought some dark brown for bear 5. Haha.
Today I bring my framed Doctor Who cross stitch from my last entry, and another bear. And a half. One and a half bears.
So, the framed piece:

Was a size 40x50cm frame (as far as I can remember haha) to give you some idea of the scale.
Tried first with a black and then a white border, but it just looked funny. So, I used the inset that came with the frame, backwards, which was just a cardboardy brown and it works so well! I love the colours together! Nice and mute. Sadly, not fantastic in my house because I go for the bright and colourful, so this just gets lost on my walls.. so I was thinking that I might sell it, and make myself another, on black....

Someone at the baby shower loved my first bear so much, they asked if they could buy one! So I made her this pale one, and then found this brilliant grey wool... so started bear 4. And bought some dark brown for bear 5. Haha.
Friday, August 31, 2012
Fire and Ice.
So, I ADORE this graphic.
It's from a brilliant episode of my newest Obsession (a.k.a Doctor Who), and is just a fantastic quote.
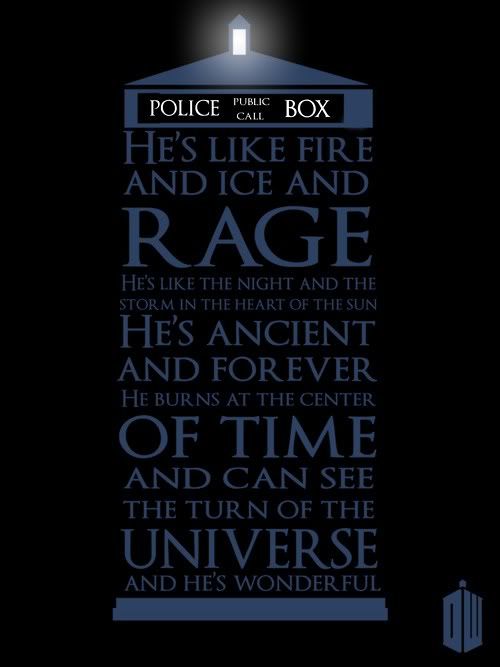
(I've tried to find out who made this, but I can't figure it out - if anyone knows, PLEASE TELL ME, I want to give them credit and a huge hug)
In fact, I adored this so much I turned it into a cross stitch pattern, with a few minor adjustments. Like the top of the TARDIS. And fixing the spelling of 'center' to the proper English, seeing as well, I'm Australian, and the show is English.
And then I stitched it.

It's stitched on hand-dyed aida, cos I couldn't find black 18 count ANYWHERE. (this is what happens when you try and dye white 18-count aida with 'Black Velvet' dye. It's a kind of blue grey. Which I actually quite like now. Wasn't sure at the start, but now I am a fan) and I used DMC thread 797. And like 60 metres of it, I guesstimated.
But it also GLOWS! I FOUND A USE FOR MY GLOW IN THE DARK THREAD!
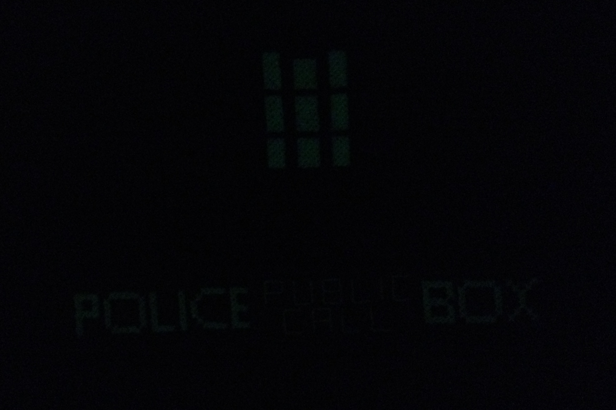
Now to figure out if I can find a frame the right size.
It's from a brilliant episode of my newest Obsession (a.k.a Doctor Who), and is just a fantastic quote.

(I've tried to find out who made this, but I can't figure it out - if anyone knows, PLEASE TELL ME, I want to give them credit and a huge hug)
In fact, I adored this so much I turned it into a cross stitch pattern, with a few minor adjustments. Like the top of the TARDIS. And fixing the spelling of 'center' to the proper English, seeing as well, I'm Australian, and the show is English.
And then I stitched it.

It's stitched on hand-dyed aida, cos I couldn't find black 18 count ANYWHERE. (this is what happens when you try and dye white 18-count aida with 'Black Velvet' dye. It's a kind of blue grey. Which I actually quite like now. Wasn't sure at the start, but now I am a fan) and I used DMC thread 797. And like 60 metres of it, I guesstimated.
But it also GLOWS! I FOUND A USE FOR MY GLOW IN THE DARK THREAD!

Now to figure out if I can find a frame the right size.
Friday, August 24, 2012
Bragging, and not much else.
Guess who is the first result if you type 'cross stitch portal' into google images?
IT'S ME! 1st and 3rd! OR FIRST AND SECOND WHEN I TRIED AGAIN.

Oh, thats a little tumblr-ish of me haha. (Speaking of which, I'm on tumblr a whoooole lot lately)
But, anyway. That makes me a little happy.. my little claim to fame.
My Portal projects original blog post
I really want to put up all of my cross stitch patterns in an easy place.. but I can't add a page.. I think its broken. I might just upload them as images into a big long blog post and make a permalink or something. Maybe. I'll have to think about it. I should really have my patterns on my own blog. I did go to all that effort to make them.
I've got a MASSIVE cross stitch I'm working on, and I'd love to show you all.. but I want the whole thing to be unveiled at once. I'm thinking in a couple of days maybe.
I was also commissioned to make another of my bears, so I'm making a few of them up to sell too.
But no new pictures today.
ETA: I FOUND HOW TO ADD PAGES. THIS MAKES ME HAPPY. Now to figure out how to successfully add all my patterns to it.
ETA,A: I now have a Patterns Page. There is a link over to the right, right up the top. Only a few cross stitch patterns so far, but I'll add more as I feel like it!
IT'S ME! 1st and 3rd! OR FIRST AND SECOND WHEN I TRIED AGAIN.

Oh, thats a little tumblr-ish of me haha. (Speaking of which, I'm on tumblr a whoooole lot lately)
But, anyway. That makes me a little happy.. my little claim to fame.
My Portal projects original blog post
I really want to put up all of my cross stitch patterns in an easy place.. but I can't add a page.. I think its broken. I might just upload them as images into a big long blog post and make a permalink or something. Maybe. I'll have to think about it. I should really have my patterns on my own blog. I did go to all that effort to make them.
I've got a MASSIVE cross stitch I'm working on, and I'd love to show you all.. but I want the whole thing to be unveiled at once. I'm thinking in a couple of days maybe.
I was also commissioned to make another of my bears, so I'm making a few of them up to sell too.
But no new pictures today.
ETA: I FOUND HOW TO ADD PAGES. THIS MAKES ME HAPPY. Now to figure out how to successfully add all my patterns to it.
ETA,A: I now have a Patterns Page. There is a link over to the right, right up the top. Only a few cross stitch patterns so far, but I'll add more as I feel like it!
Tuesday, July 31, 2012
More fluffy cute things.
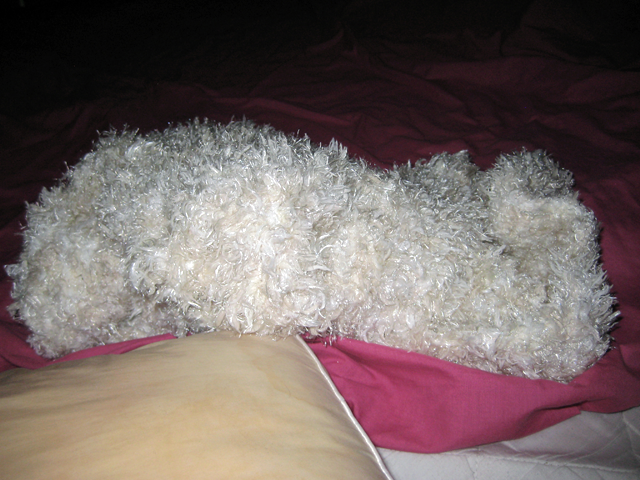
What could this be?
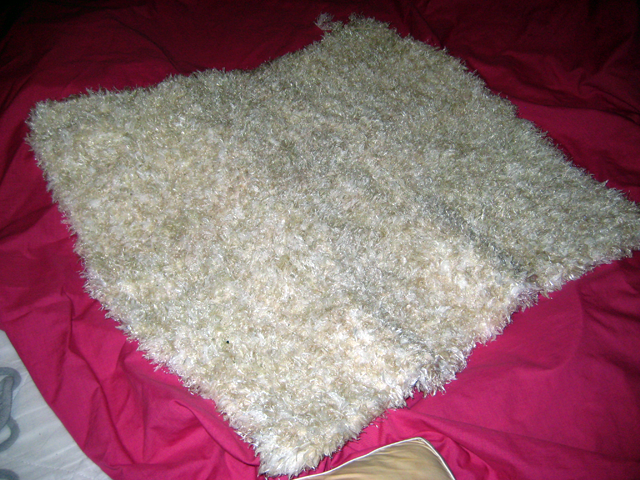
It's a blanket!
A warm, fluffy and ridiculously light blanket.
I almost don't want to give it away, it's too fluffy and warm!
My cats totally agree.

Pattern:
10mm crochet hook
5 balls of Moda Vera's Blissful
CH 56, turn.
*DC into each sc. (55 total) *
Repeat until square.
Weave in ends, trim.
SO BORING TO MAKE, BUT SO PRETTY.
Wednesday, July 25, 2012
Bears!
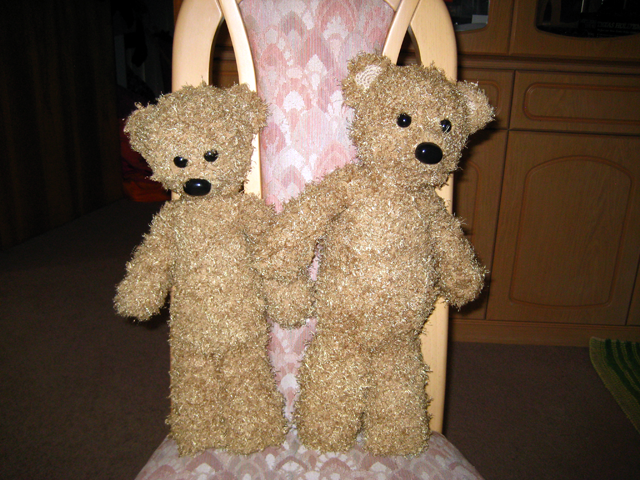
Now I've made two bears.
I didn't even manage to follow my own pattern (from memory) so my second bear is bigger and fatter haha. He was meant to test my pattern and I FORGOT TO FOLLOW IT. Haha. I'm hopeless.
But he's still gorgeous. If a little lopsided.
Now I can send them off to their various new owners!
Tuesday, July 17, 2012
More Polymer Clay
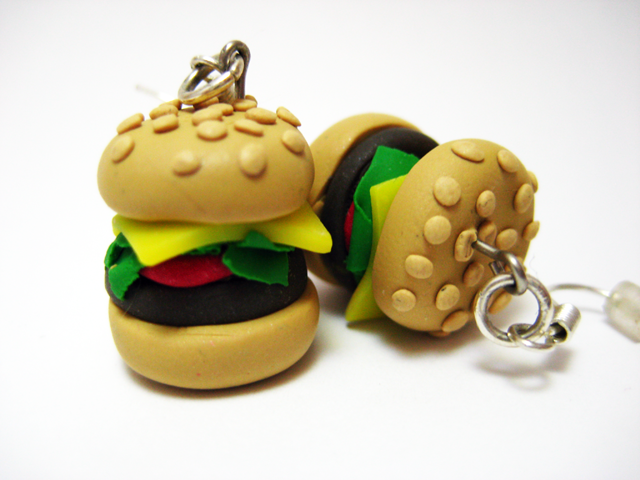
My new earrings.
Yes, before anyone mentions it, I know that the layers could be called 'wrong', cheese should be over the patty so it melts - but I don't care! Haha. THEY ARE CUTE.
Also, not that I've likely mentioned it here before, yes I am a vegetarian. Who says these are meat patties? they could be vegie/lentil/falafel/faux meat ones! :)
Made from Sculpey III Polymer clay and sterling silver jewellery bobbits*.
*what do you mean bobbits isn't a technical term? Fine, 'findings', as they are called on ebay. :)
Sunday, July 15, 2012
All the kids are having kids...
Well, not really, but two of my 30+ aged friends are having babies next month, so I've been making them baby gifts - and not that I need an excuse to make cute and fluffy things, I've enjoyed making said cute and fluffy things.
First up, I made this bear:
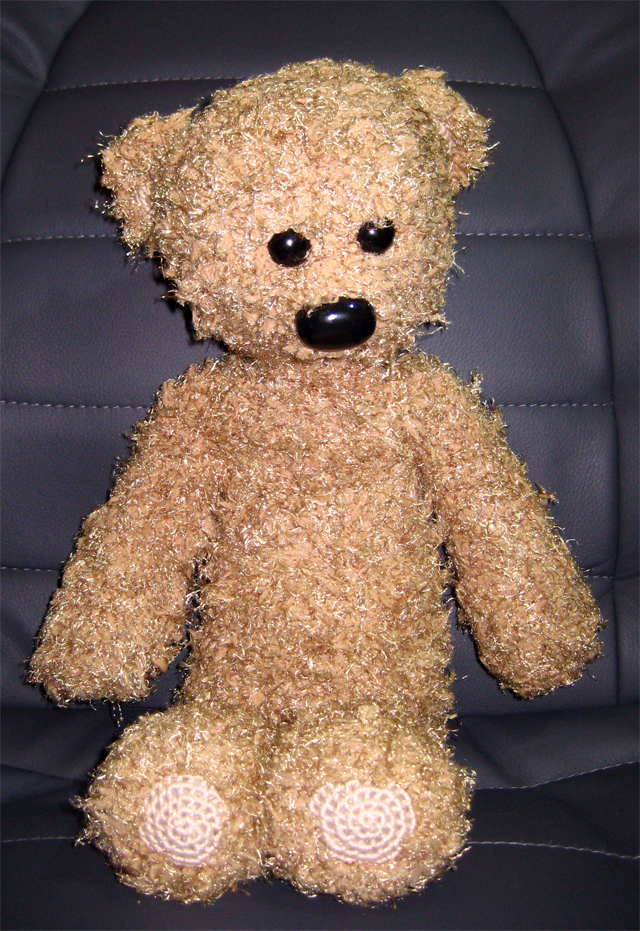
I ADORE HIM.
I found these balls of wool on sale at Lincraft for $2 (it's called Sullivans Shimmer Knitting Yarn) and just saw him in them.
I made up my pattern as I went along - and I tried to document what I was doing so I could replicate him (and or write up my first crochet pattern)but I got to the shoulders/neck and did some creative crocheting techniques (because fluffy wool hides all) - so I will have to make another and attempt to recreate what I did, in some easily explainable way.
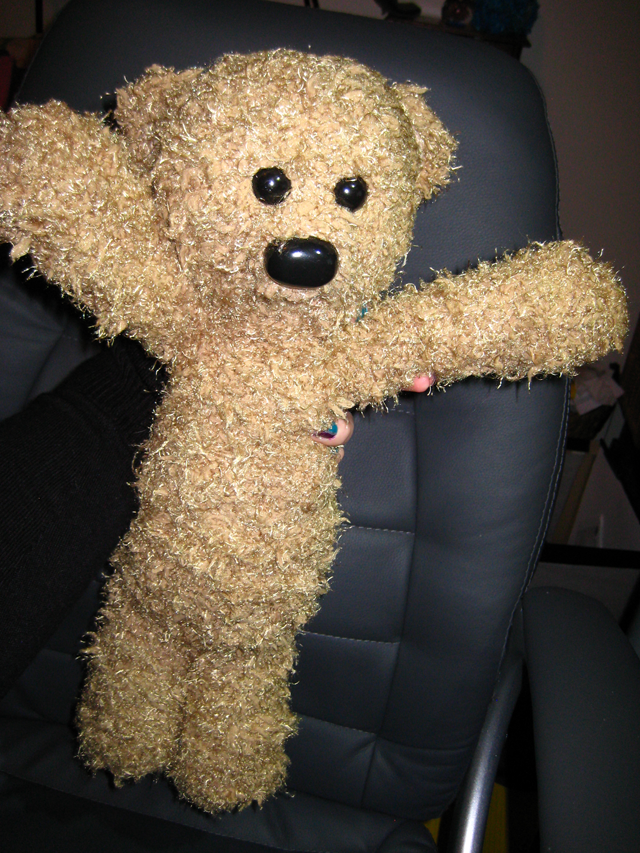
He's super fluffy and soft.
I also figured out how to make him fluffier on the outside, because as a left hander (not sure about righties), I have such problems with it being fluffier on the inside from the way I crochet into the circle. But, I figured if I started a magic circle with thinner yarn (as you can see in the inside of his ears and the bottom of his feet) and then crochet in the opposite direction around the circle with the fluffy yarn I could get it with most of the fluff on the right side! His feet and ears you can obviously see the thinner yarn - but I also did it with his arms - just crocheted a magic circle with the thin wool and attached the fluffy yarn for the next level of the circle.
He's all in once piece too, except for his nose and ears, so he will be relatively kid-proof.
I started at the bottom with his legs, and like with making ami hearts, (good pattern for those here: Free Heart Pattern) you just join them together. The same goes for his arms.
Anyway, most of this would be much better photographed and explained through a pattern if I ever get there haha.
So far he is my one and only prototype, and at the speed I've been making things, he'll be off to Canada in a few weeks! I'll have to speed up. But crocheting baby blankets, even with a 10mm hook and DC still takes forever....
First up, I made this bear:

I ADORE HIM.
I found these balls of wool on sale at Lincraft for $2 (it's called Sullivans Shimmer Knitting Yarn) and just saw him in them.
I made up my pattern as I went along - and I tried to document what I was doing so I could replicate him (and or write up my first crochet pattern)but I got to the shoulders/neck and did some creative crocheting techniques (because fluffy wool hides all) - so I will have to make another and attempt to recreate what I did, in some easily explainable way.

He's super fluffy and soft.
I also figured out how to make him fluffier on the outside, because as a left hander (not sure about righties), I have such problems with it being fluffier on the inside from the way I crochet into the circle. But, I figured if I started a magic circle with thinner yarn (as you can see in the inside of his ears and the bottom of his feet) and then crochet in the opposite direction around the circle with the fluffy yarn I could get it with most of the fluff on the right side! His feet and ears you can obviously see the thinner yarn - but I also did it with his arms - just crocheted a magic circle with the thin wool and attached the fluffy yarn for the next level of the circle.
He's all in once piece too, except for his nose and ears, so he will be relatively kid-proof.
I started at the bottom with his legs, and like with making ami hearts, (good pattern for those here: Free Heart Pattern) you just join them together. The same goes for his arms.
Anyway, most of this would be much better photographed and explained through a pattern if I ever get there haha.
So far he is my one and only prototype, and at the speed I've been making things, he'll be off to Canada in a few weeks! I'll have to speed up. But crocheting baby blankets, even with a 10mm hook and DC still takes forever....
Wednesday, June 20, 2012
This was a triumph!
I'm making a note here, huge success.
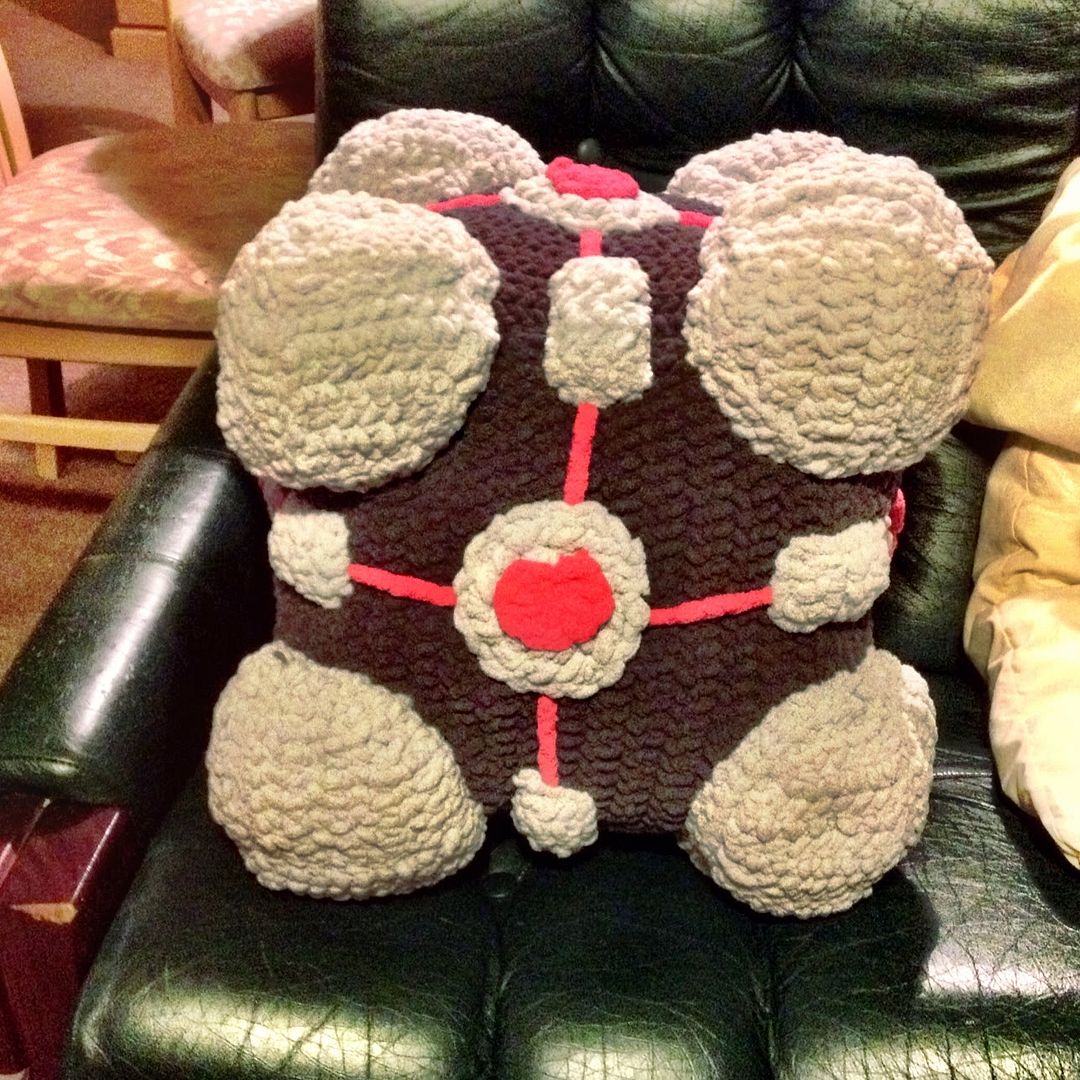
I finally finished it! My very own companion cube.
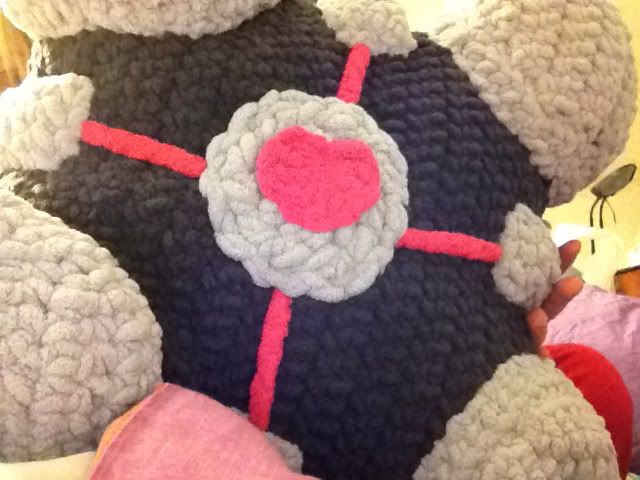
All it took was about 14 skeins of chenille acrylic; 7 dark grey, 6 light grey and one pink, an 8mm crochet hook, a 15mm hook for the hearts, a whole heap of fiberfill and I've forgotten how much time.
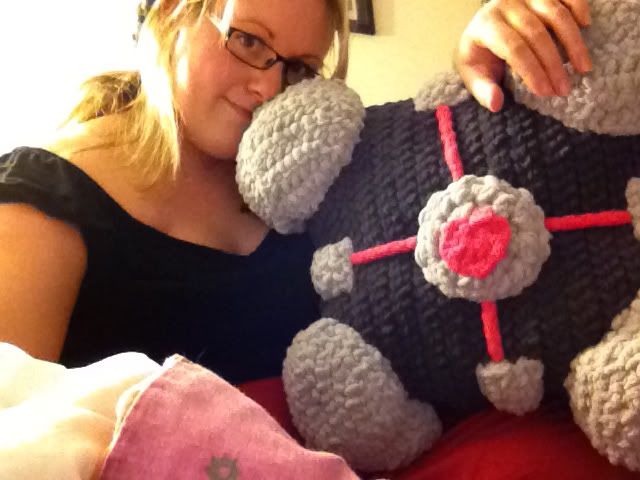
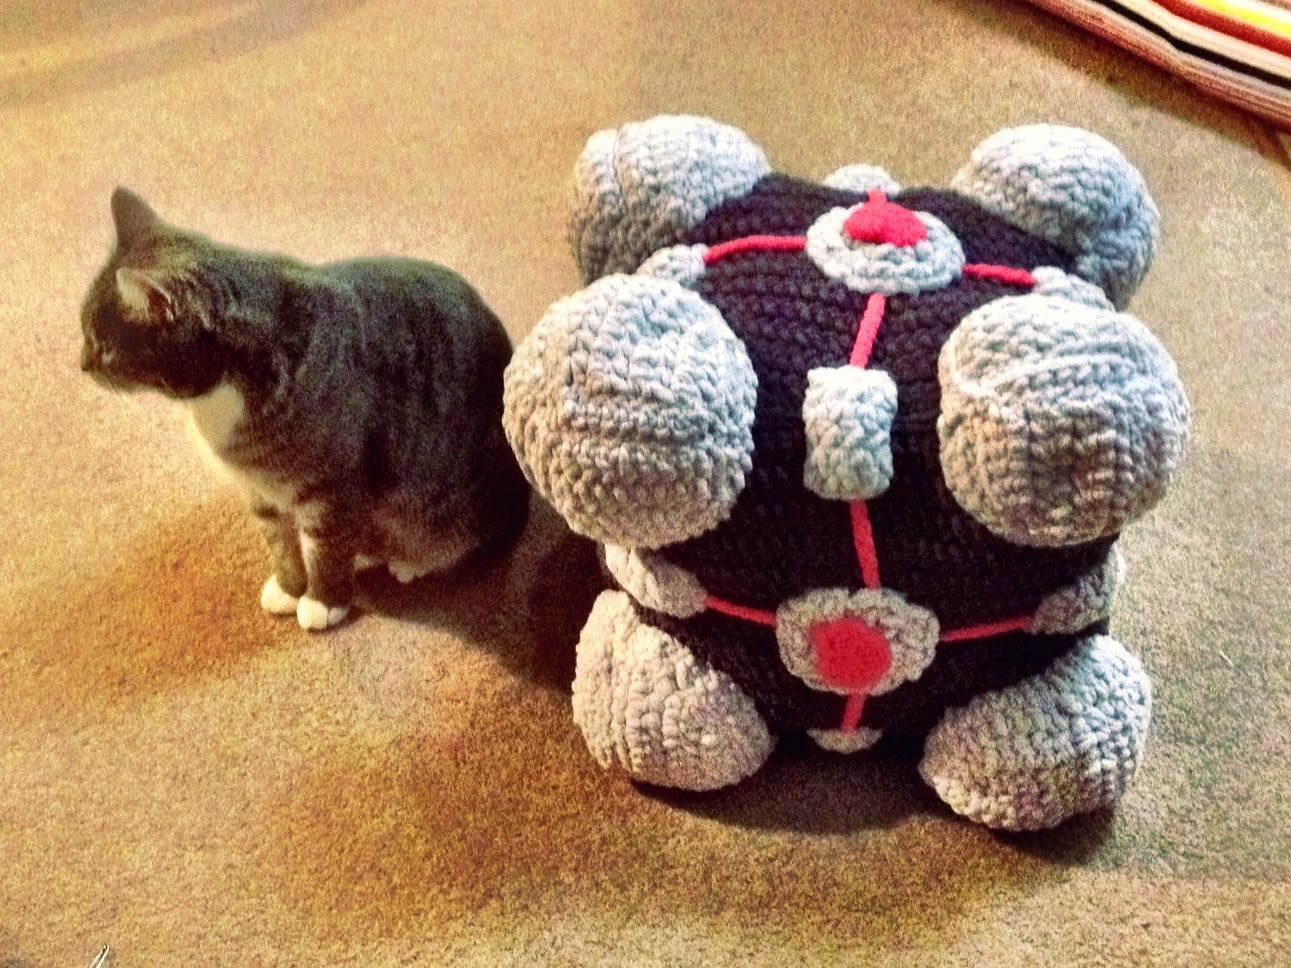
I kinda used this pattern but changed it to suit my wool. But that is the basic idea of how I made it. Cos it's fluffy wool, it's very forgiving- you can't really do much detail work, so perfection isnt really an issue. Like on one of the small light grey triangles I was a row short, but you can't even guess which was the mistake once it was sewed together.
My huge chenille wool was fantastic for this project- meant that it was super quick to crochet each piece and keep the cube huge, my problem is that there were just so damn many pieces! Each face has like 28 individual crochet pieces that had to be sewn together. So that's 168 pieces in total, ish. It took a long time, and they, while quick to make, were pretty monotonous. Plus I'm easily distracted. :)
ETA: because I was so super excited to show off my finished companion cube, I used my iPhone cameras and editing tools, and we all know that they don't always turn out quite as nice as my actual cameras photo when taking crafty photos, so here are a few of my cube with the good camera :)
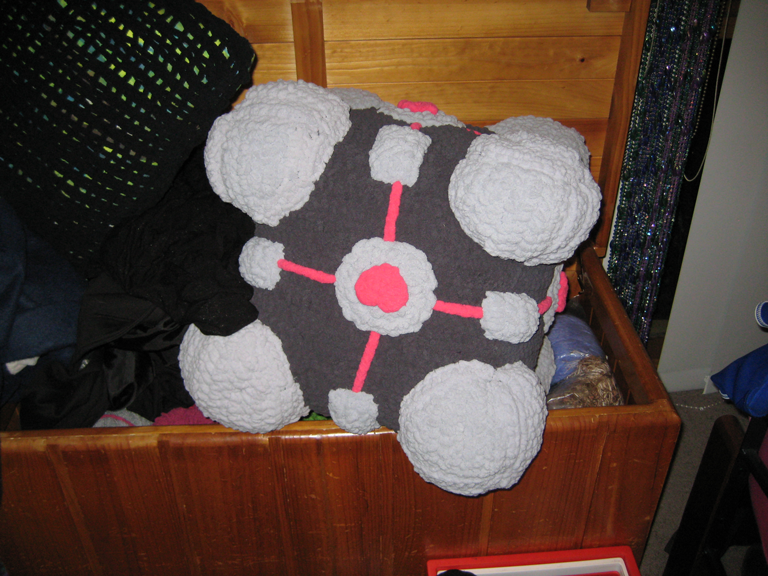
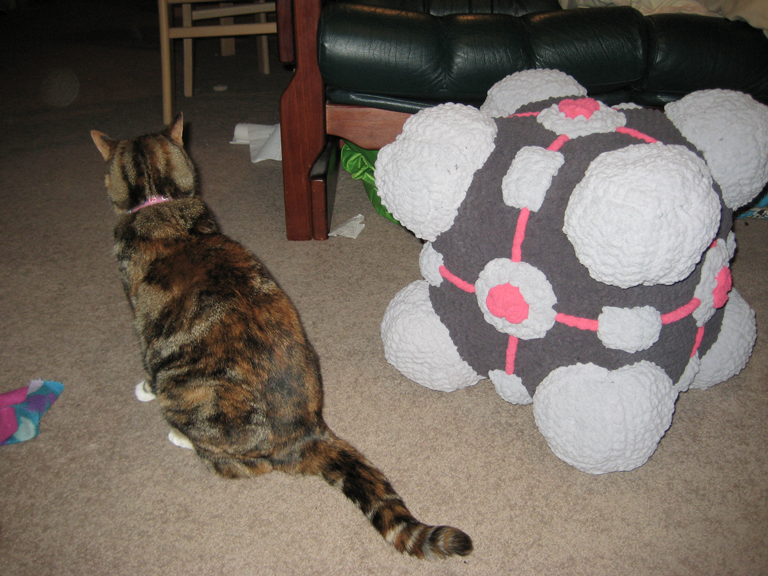


I finally finished it! My very own companion cube.

All it took was about 14 skeins of chenille acrylic; 7 dark grey, 6 light grey and one pink, an 8mm crochet hook, a 15mm hook for the hearts, a whole heap of fiberfill and I've forgotten how much time.


I kinda used this pattern but changed it to suit my wool. But that is the basic idea of how I made it. Cos it's fluffy wool, it's very forgiving- you can't really do much detail work, so perfection isnt really an issue. Like on one of the small light grey triangles I was a row short, but you can't even guess which was the mistake once it was sewed together.
My huge chenille wool was fantastic for this project- meant that it was super quick to crochet each piece and keep the cube huge, my problem is that there were just so damn many pieces! Each face has like 28 individual crochet pieces that had to be sewn together. So that's 168 pieces in total, ish. It took a long time, and they, while quick to make, were pretty monotonous. Plus I'm easily distracted. :)
ETA: because I was so super excited to show off my finished companion cube, I used my iPhone cameras and editing tools, and we all know that they don't always turn out quite as nice as my actual cameras photo when taking crafty photos, so here are a few of my cube with the good camera :)


Wednesday, May 23, 2012
Project infodump!
I've been loving my crayon arts and crafts lately.
I adore playing with them.
This one is my favourite:
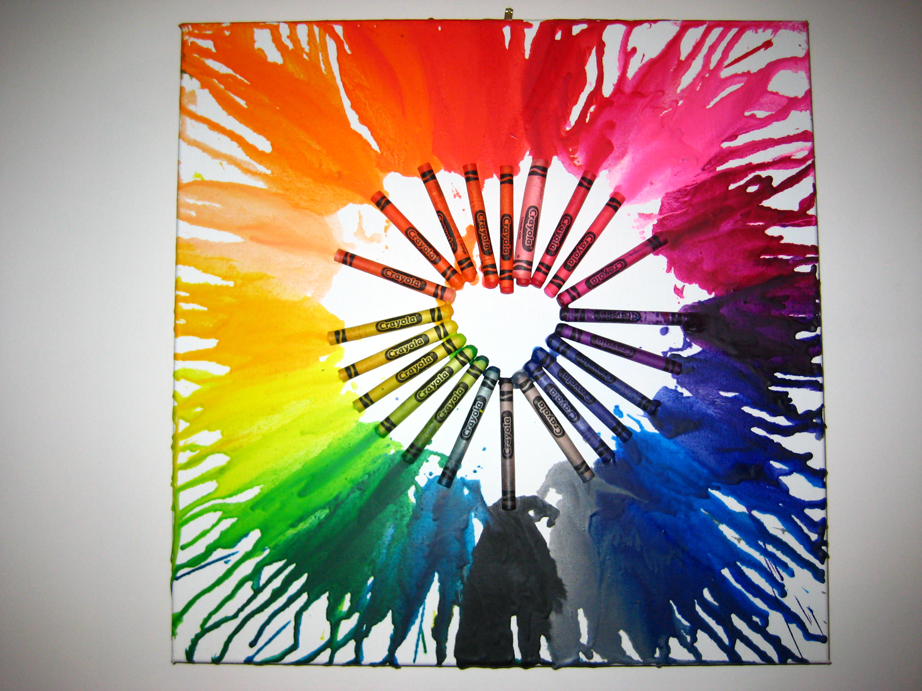
Materials: Crayola 24 packet of crayons, hot glue gun, canvas, a hairdryer and about 40 minutes of my time.

Materials: Cheap 64 box of crayons, hot glue gun, canvas board, twine and a bunch of $2 fake yellow flowers.
Below is the one I did tonight.
I discovered that the best way to get good drips without having to go between a candle/lighter and the canvas was to light the paper crayon cover on fire... not my smartest move because that gets hot, and crayons are mostly wax, and now I have the welts from a spitting crayon (cos I relit it after I doused it in water), and my house stills smells faintly of burnt crayon, but damn this was fun :)
It also contains my first attempt at pretty poor papercutting.
My knife wasn't nearly sharp enough to get good lines, nor did I plan it very well, but I think its damn cute. :)

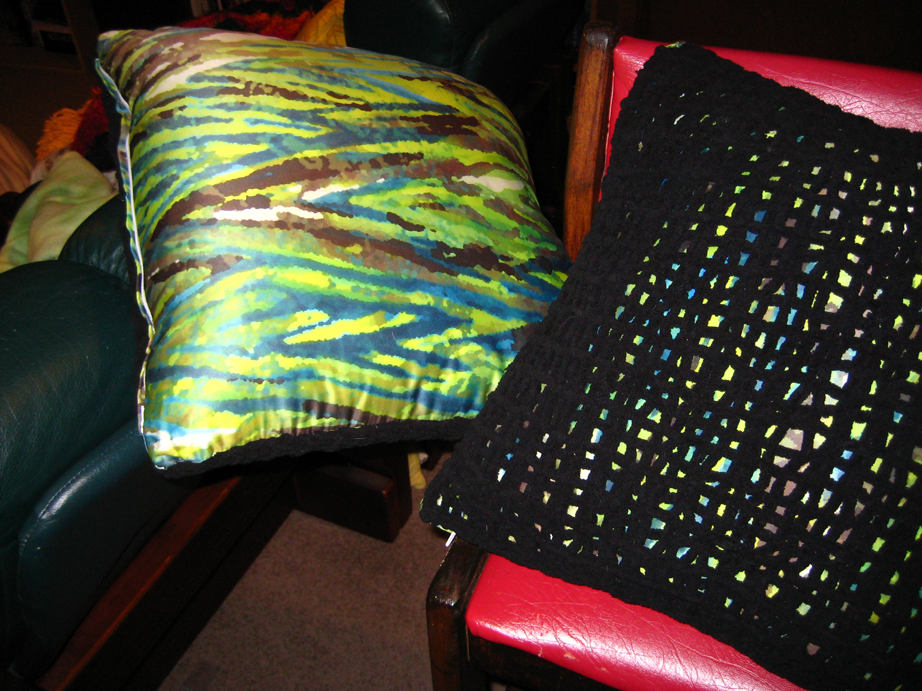
I also bought these cushions at christmas, with the intention of making a crochet net cover, letting the pretty pattern show through, but I didn't find any I liked, so I knitted a big square with big wool and 12mm needles. I really like the texture of the wool over the satiny pillow cover, I think it works well.
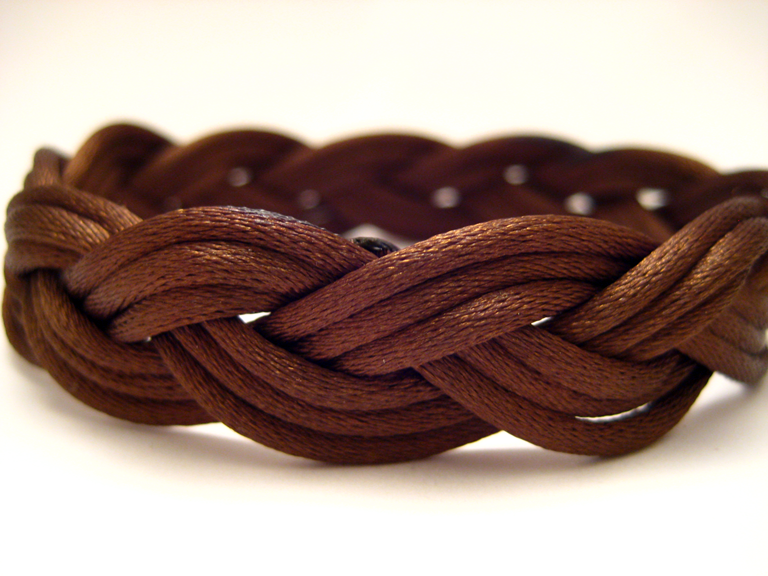
Then I made these Turks Head Knot bracelets:
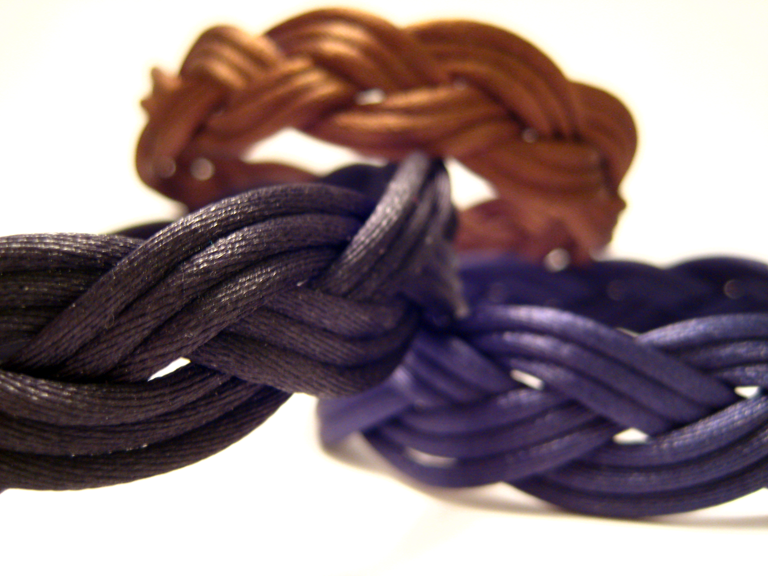
My sister gave me heaps of this nylon cord (about 2mm thick?) that she had no use for anymore, so I decided to use it.
I also made a lightbox to take better photos in.
I think it works pretty well if I say so myself. Even if I did manage to stain the bottom of the box with its first trial model (apparently Lego rubber wheels deteriorate and leave an oily residue on things once they age a little..) And whoever knew that white poster paper would be so damn hard to find? There must be a shortage in Geelong at least, cos I tried three stores before I found ANYTHING I could use.
I adore playing with them.
This one is my favourite:

Materials: Crayola 24 packet of crayons, hot glue gun, canvas, a hairdryer and about 40 minutes of my time.

Materials: Cheap 64 box of crayons, hot glue gun, canvas board, twine and a bunch of $2 fake yellow flowers.
Below is the one I did tonight.
I discovered that the best way to get good drips without having to go between a candle/lighter and the canvas was to light the paper crayon cover on fire... not my smartest move because that gets hot, and crayons are mostly wax, and now I have the welts from a spitting crayon (cos I relit it after I doused it in water), and my house stills smells faintly of burnt crayon, but damn this was fun :)
It also contains my first attempt at pretty poor papercutting.
My knife wasn't nearly sharp enough to get good lines, nor did I plan it very well, but I think its damn cute. :)

I also bought these cushions at christmas, with the intention of making a crochet net cover, letting the pretty pattern show through, but I didn't find any I liked, so I knitted a big square with big wool and 12mm needles. I really like the texture of the wool over the satiny pillow cover, I think it works well.

Then I made these Turks Head Knot bracelets:

My sister gave me heaps of this nylon cord (about 2mm thick?) that she had no use for anymore, so I decided to use it.

I also made a lightbox to take better photos in.
I think it works pretty well if I say so myself. Even if I did manage to stain the bottom of the box with its first trial model (apparently Lego rubber wheels deteriorate and leave an oily residue on things once they age a little..) And whoever knew that white poster paper would be so damn hard to find? There must be a shortage in Geelong at least, cos I tried three stores before I found ANYTHING I could use.
Sunday, April 29, 2012
More Clay Things!
Good afternoon all!
I've been having a lovely time crafting things, and have been really bad documenting what I've been up to. So here goes:
1. Playing with Polymer Clay: Getting the hang of al-foil as a sculpture medium.
These both have aluminium foil cores, covered with Sculpey III.
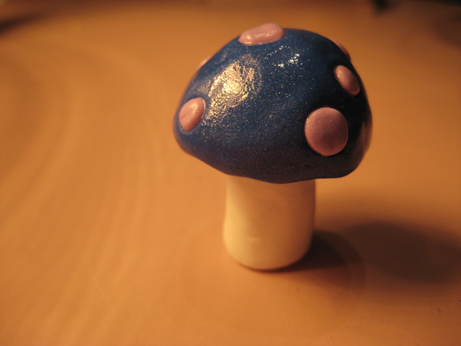
Still learning how to think like a clay artist who can fire and re-fire pieces as many times as needed. I finally fired all the spots, then put them into the mushroom, cos I kept squashing them!

It's really hard to make a ball symmetrical... Needs some smoothing down in this photo still.
2. Getting the hang of blending up colours, and using my newpasta machine clay conditioner machine.


3. Putting all the tricks together and making a birthday present!


He's about 12cm tall, and is an al-foil skeleton covered in Sculpey III clay- mostly bought colours, but a few I blended myself, varnished with clear nail polish.
PS: Have started to upload larger images of my work too - 640 is a little small for this day and age... but due to my blog being somehow to awesome*, the Lightbox feature of Blogger is totally not working or even an option, so if you'd like, even though its not quite the same or as easy, you (firefox users at least) can right click and 'View Image' and it will show you the larger image on my photobucket account which loads in a grey window anyway and then use the back buttons to come back to the page... If I've made the image lots smaller for blog use, instead of just compressing the image in the browser and making you all download huge images, I'll link to another page where it's made big properly. :)
I've been having a lovely time crafting things, and have been really bad documenting what I've been up to. So here goes:
1. Playing with Polymer Clay: Getting the hang of al-foil as a sculpture medium.
These both have aluminium foil cores, covered with Sculpey III.

Still learning how to think like a clay artist who can fire and re-fire pieces as many times as needed. I finally fired all the spots, then put them into the mushroom, cos I kept squashing them!

It's really hard to make a ball symmetrical... Needs some smoothing down in this photo still.
2. Getting the hang of blending up colours, and using my new


3. Putting all the tricks together and making a birthday present!


He's about 12cm tall, and is an al-foil skeleton covered in Sculpey III clay- mostly bought colours, but a few I blended myself, varnished with clear nail polish.
PS: Have started to upload larger images of my work too - 640 is a little small for this day and age... but due to my blog being somehow to awesome*, the Lightbox feature of Blogger is totally not working or even an option, so if you'd like, even though its not quite the same or as easy, you (firefox users at least) can right click and 'View Image' and it will show you the larger image on my photobucket account which loads in a grey window anyway and then use the back buttons to come back to the page... If I've made the image lots smaller for blog use, instead of just compressing the image in the browser and making you all download huge images, I'll link to another page where it's made big properly. :)
*Somehow my blog was converted to dynamic view, even though I use a standard Awesome Inc. template, and even if I go through and reset all of my settings (and I customised this template quite extensively) with a standard template, my beautiful blog I love the look of, looks funny AND Lightbox still doesn't work. So I've spent the better part of two hours playing with this, and now I'm giving up. I tried, I promise, but it's not going to work right now. Maybe when I try again in six months it will work no worries :)
Tuesday, March 13, 2012
More Juggling Balls!
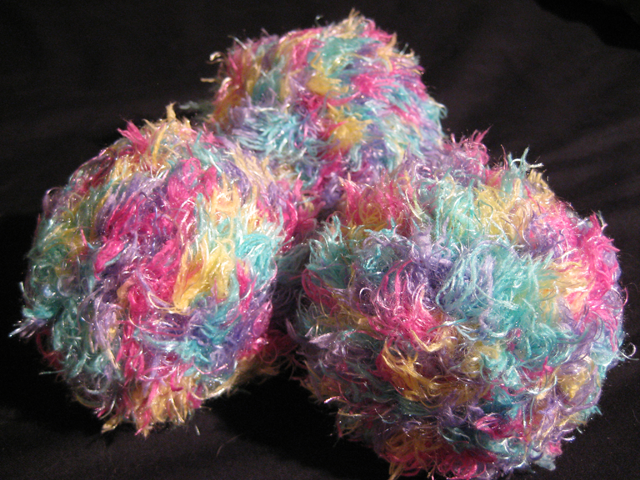
Went to a music festival over the long weekend, made these while I was sitting at the campsite :)
They are fluffy, really soft wool (Blissful by Moda Vera, from Spotlight), with a 5.00 mm hook. You might remember these (The Evolution of a Fluff Ball/Tribble I made a while back) - yes, using the same style of wool in a different shade - but I've since learned how to better crochet the fluffy wool directly, so these don't have an under-net like my older tribbles.
The insides are a really cheap tennis ball, so they even have a slight bounce! It was actually way easier than I thought it would be to crochet a firm net around a tennis ball, and close the circle around it. Just basic sc, and increase and decreases. :)

How fluffy are they?!!
I'm contemplating making a few variations and seeing if I can sell them, I think. :)
Wednesday, February 22, 2012
Piggy and Me
Remember this model?
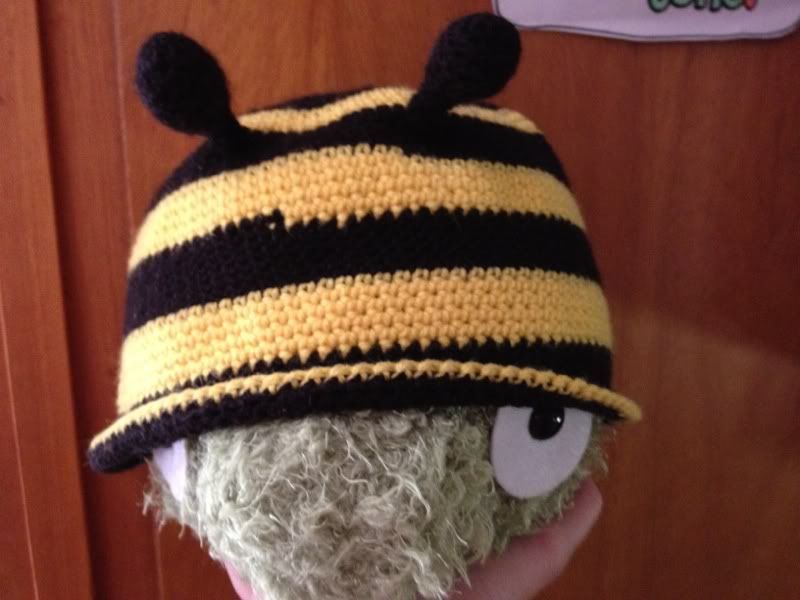
Here he is!! All finished, and hanging out on my trampoline.

And hanging out with me in my room, and for some reason my camera has chosen to photograph like we're out clubbing or something.

And here is me being 'artistic' with photoshop... haha.

And I'm trying out better ways to photograph my clay thingys, but apparently only the rabbit is photogenic. I'll coach the others through their issues, and see if I can't get some better pictures for later projects. :)


Here he is!! All finished, and hanging out on my trampoline.

And hanging out with me in my room, and for some reason my camera has chosen to photograph like we're out clubbing or something.

And here is me being 'artistic' with photoshop... haha.

And I'm trying out better ways to photograph my clay thingys, but apparently only the rabbit is photogenic. I'll coach the others through their issues, and see if I can't get some better pictures for later projects. :)

Thursday, February 16, 2012
Discovered another love.
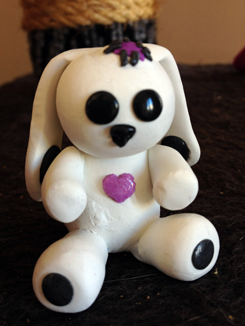
So, instead of finishing off all the little bits and pieces I've been meaning to, I took up another medium of craft.
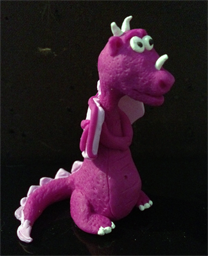
I'M SO IN LOVE WITH POLYMER CLAY!
I bought three colours of Sculpey III (Even after reading the kinda mean reviews about it not being that great; but also, it's all I could find at my local craft store) and played around with it - made my purple dragon, a few swirly buttons, a few really basic canes... Then I went and bought some more colours. And found the Fimo Soft brand at another store. I bought a convection oven from Kmart (for $39!) and now I've got SO MANY things that I want to make, in crochet (next up: dragons made with really nice wool and a 2.5 hook, or a crochet Companion Cube in fluffy kinda wool using a 8mm hook) and I want to learn to knit, and I have a few cross stitch things I really want to get back into doing, as well as playing with all my new clay.
I'm almost going to have to schedule these out. One week at a time. Or maybe a day at a time.
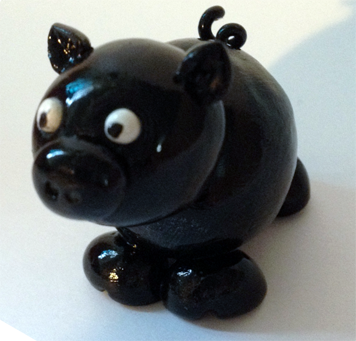
(Nail polish also makes a fantastic varnish :p )
PS: These photos are terrible - might take better ones when my camera is charged
Subscribe to:
Comments (Atom)
