I turned three balls of string and half a meter of material into this pretty thing!

ISN'T IT JUST SO PRETTY? I am so happy with how it turned out! And I'm overusing exclamation marks I'm that excited!
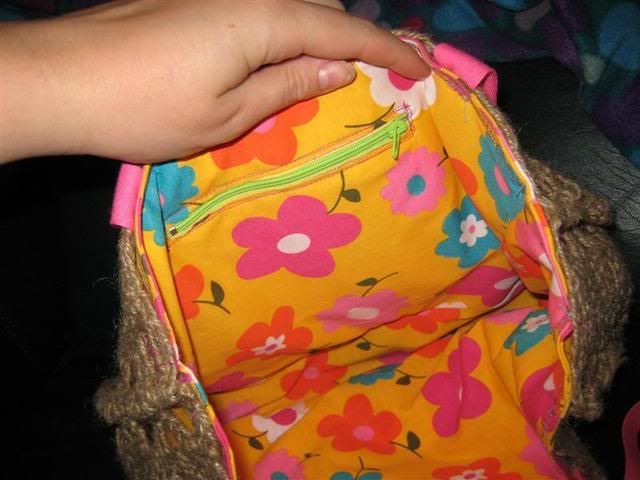
I love this material, bright and kinda retro. Totally gorgeous.
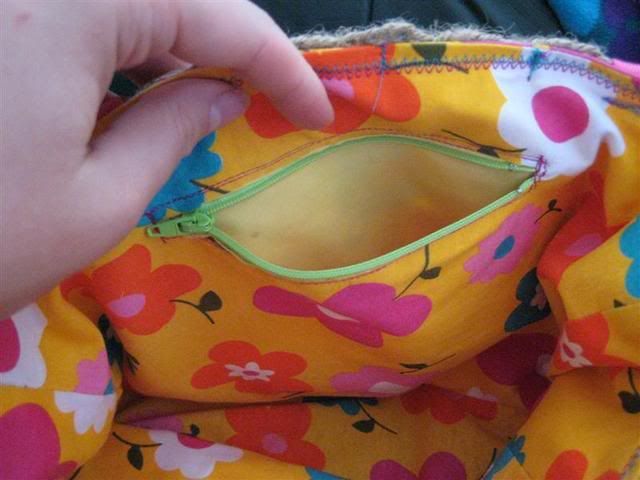
I PUT IN A ZIPPER! OMG. Wow. This is a massive achievement on my behalf, and the first time I've put one in in about 9 years. And I made up my own method of putting it into the panel, so I have no idea if it will stay properly or not, but I like it. I had fun playing, and I made something! Hooray. :D
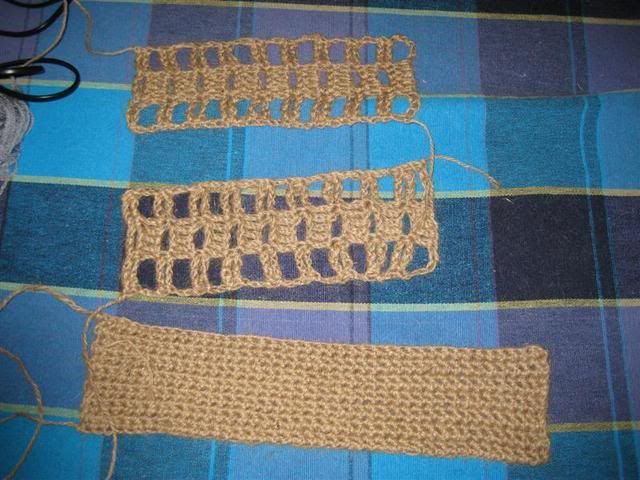

Still in bits!
I crocheted it all in one sitting, and I have to say, twine is tougher to crochet than I assumed it would be, even after hearing others complain about it. Poor fingers were a bit tired and sore after trying to keep the tension on that rough material right!
EDIT: I forgot to link to the pattern!! Can be found here:
Ravelry - Quahog Beach BagPattern notes: I made my bag 8ch longer to begin with, to make it one pattern repeat wider. I doubt I could repeat performance making the lining, but as the pattern just says 'make lining' I'll try to give some more pointers: I can say that I double lined it so the pretty material showed on the inside, and through the string. I cut a small hole in one side panel and sewed in a zip I'd already sewed to a bit of material that served as a pocket lining. I learned that you must first install the zip and THEN sew up the pocket, otherwise it will end badly. Iron the seams flat at all opportunities, it looks so much nicer if you do. Once I'd finished both halves of the lining, sew them together, pretty sides facing each other. (I didn't sew a bottom on the outside layer) Then turn the right way out, and sew the lining to the string. I chose strategic spots to sew in the lining, both sides of the corners, and the handles instead of sewing all the way around. I hand stitched the bottom of the lining to the bottom of the bag so it stays in place.
I took it to the beach with me for my work staff party, and it was a fantastic success. Hooray, it holds my beach towel, some water and a few books! And is now full of sand. :P